Have you ever considered how the simple act of cleaning your pruning tools can profoundly impact the health and beauty of your garden? Each cut made by your tools can either promote healthy growth or expose your plants to harmful pathogens.
In this informative guide, we'll delve into the reasons why cleaning your tools is crucial for the health of your plants and explore the step-by-step process for keeping them in pristine condition.
From understanding the benefits of clean garden equipment to mastering the art of disinfection, join us as we uncover the secrets to effective pruning tool maintenance and ensure your garden thrives all season long.
• Why Clean Your Pruning Tools?
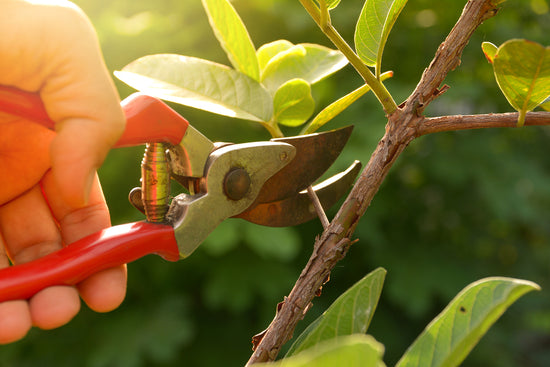
Cleaning your tools isn't just about upkeep, it's essential for the health of your garden. Each time you use your pruning shears, they collect sap and microscopic pathogens that can corrode the tool and spread disease from one plant to another. This is particularly risky if you trim a diseased branch and then move on to a healthy plant without cleaning your tools.
Moreover, clean, well-maintained tools make gardening easier and more efficient. Sharp, clean blades ensure smoother, more precise cuts, which reduces stress on plants and promotes quicker healing. This not only helps keep your plants healthy but also extends the life of your tools, saving you money and time.
Regularly cleaning your garden tools after use ensures they remain effective and ready to go, keeping your garden flourishing and reducing the spread of disease.
• The Importance of Disinfecting Your Tools
Did you know that simply cleaning your garden equipment might not be enough to protect your plants from diseases? Disinfecting is a crucial step to eliminate harmful bacteria, fungi, and viruses that can cling to the blades of your garden secateurs and other cutting tools.
These pathogens are invisible threats that can spread disease throughout your garden, potentially causing widespread damage before you even notice any signs of distress.
Incorporating a simple disinfecting routine after cleaning your tools can keep your garden thriving. Using household items like rubbing alcohol or a diluted bleach solution can effectively disinfect pruning tools without requiring harsh or expensive chemicals. This not only ensures the well-being of your garden but also prolongs the effectiveness and lifespan of your tools, enhancing your overall gardening experience.
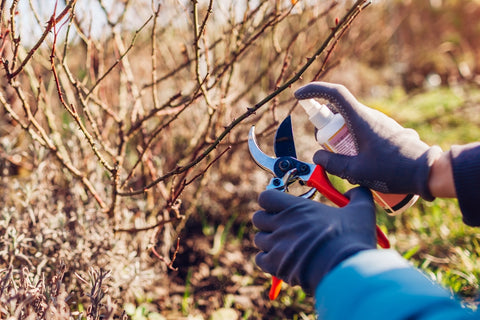
• How to Disinfect Your Tools Effectively
Prepare a Disinfectant Solution: Mix a solution of one part bleach to nine parts water or use a commercial disinfectant specifically designed for garden tools.
Soak the Tools: Submerge the blades of your tools in the solution for at least 30 seconds.
Rinse and Dry: Rinse the tools with clean water and dry them completely with a clean cloth.
• Step-by-Step Guide to Cleaning Garden Tools
Keeping your tools clean is not just beneficial for your garden's health — it also extends the life and effectiveness of your tools. Here’s a step-by-step guide to ensure your tools are always ready for action:
1. Gather Your Supplies
You’ll need some basic items: warm soapy water, a stiff brush or an old toothbrush, lubricating oil, and a clean cloth. These tools will help you remove dirt and apply necessary aftercare to your shears.
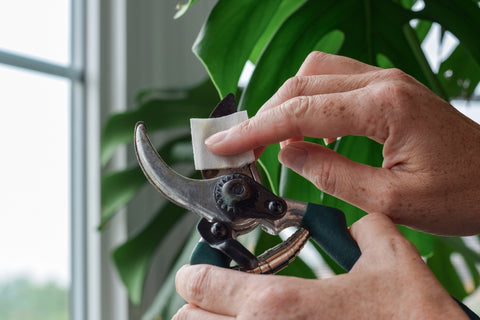
2. Remove Sap and Dirt
Start by wiping down the blades with a cloth to remove any loose debris. For tougher sap and grime, soak the blades in warm soapy water for a few minutes. This will help loosen the residue, making it easier to scrub off.
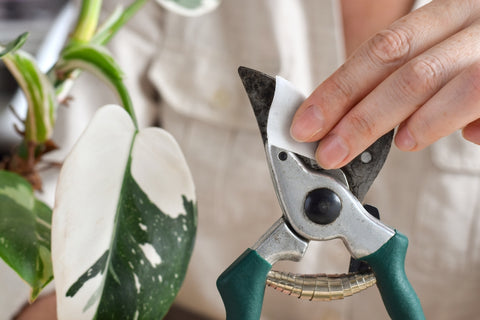
3. Scrub the Blades

Take your brush and scrub the blades thoroughly to remove all the sap and dirt. Be sure to get into the joints and crevices where residues commonly accumulate.
4. Rinse and Dry
Once you’ve scrubbed the shears clean, rinse them under clean water to wash away any remaining soap and loosened dirt. Immediately dry the shears with a clean cloth to prevent rusting. Ensure no moisture is left, especially at the pivot point and along the blades.
5. Apply Lubricating Oil
After the shears are dry, apply a few drops of lubricating oil to the blades and the pivot area. This not only helps protect against rust but also keeps the mechanism moving smoothly.
6. Test the Shears

Finally, make a few test cuts on scrap garden material to ensure the shears operate smoothly. This helps spread the oil evenly and lets you feel if any further cleaning or oiling is necessary.
By following these simple steps, your garden tools and equipment will remain in top condition, making your gardening more efficient and enjoyable. Plus, you’ll avoid the extra expense and hassle of replacing them prematurely.
• Conclusion
Maintaining your tools is not just about keeping them looking good, it’s about ensuring they work efficiently and safely season after season.
Regular cleaning and disinfection will safeguard your plants from diseases, enhance your gardening experience, and extend the life of your tools.
Take the time to care for your gardening equipment, and your garden will show its appreciation through beautiful blooms and healthy growth.